NetSuite
NetSuite uses REST web services for integration. The Base URL is https://{account-id}.suitetalk.api.netsuite.com.
See the NetSuite REST documentation and REST API Browser for full details.
Setup Guide
You'll need the following information to set up your NetSuite App with Iconnek SYNC:
| Input | Notes | Example |
|---|---|---|
| Account ID | Retrieved from your NetSuite base URL | 0000000 |
| Consumer Key | From the integration you create | |
| Certificate ID | From the OAuth 2.0 setup you configure |
Preparing the connection
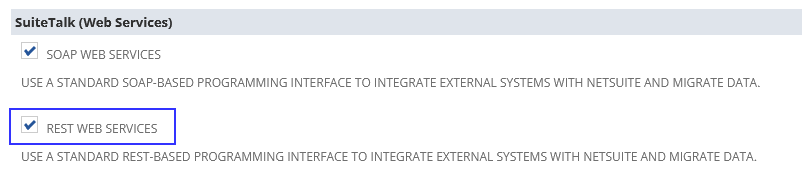
Enable features
To use NetSuite REST web services, the relevant features must be enabled and the user must have required permissions.
- Navigate to Setup > Company > Enable Features then select the SuiteCloud tab.
- Enable the Rest Web Services checkbox options under SuiteTalk (Web Services).
- Click Save.
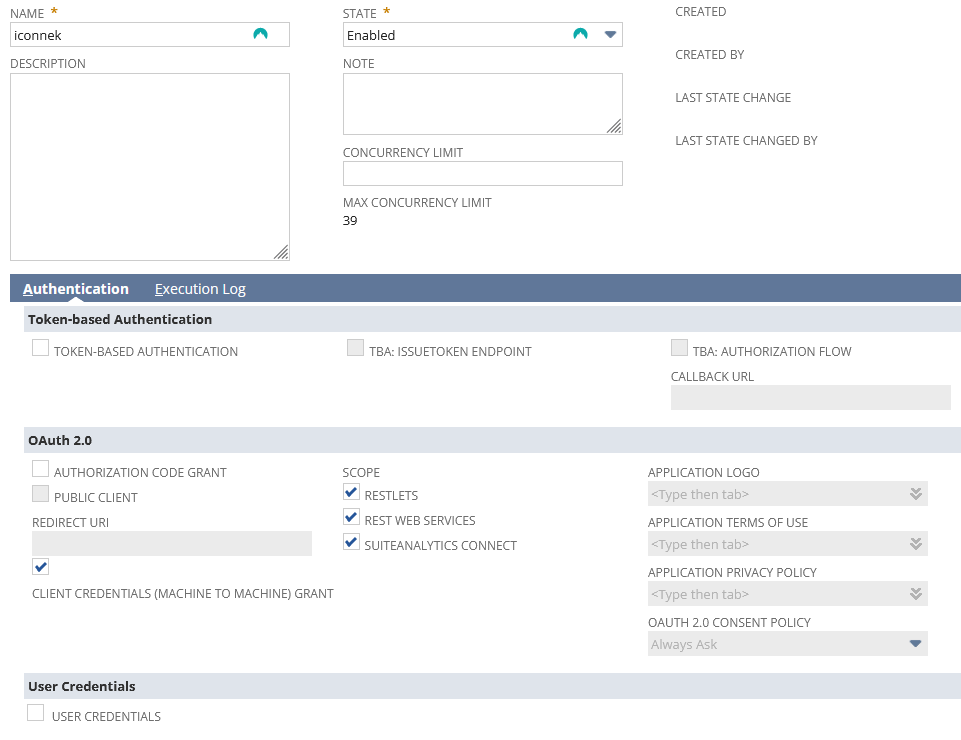
Add a New Integration
- In your NetSuite account, navigate to Setup > Integration > Manage Integrations > New.
- Add a Name, a Description, and set State to
Enabled. - Uncheck everything in Token-based Authentication. If not possible:
- In OAuth 2.0: Check Client credentials.
- In Token-based Authentication: Uncheck all fields.
- In OAuth 2.0 section under Scope, check all available fields (
RESTLETS,REST WEB SERVICES,SUITEANALYTICS CONNECT). - Check Client Credentials (Machine to Machine grant).
- Save the integration.
- Copy the Client ID (Consumer ID) and Client Secret (Consumer Secret).
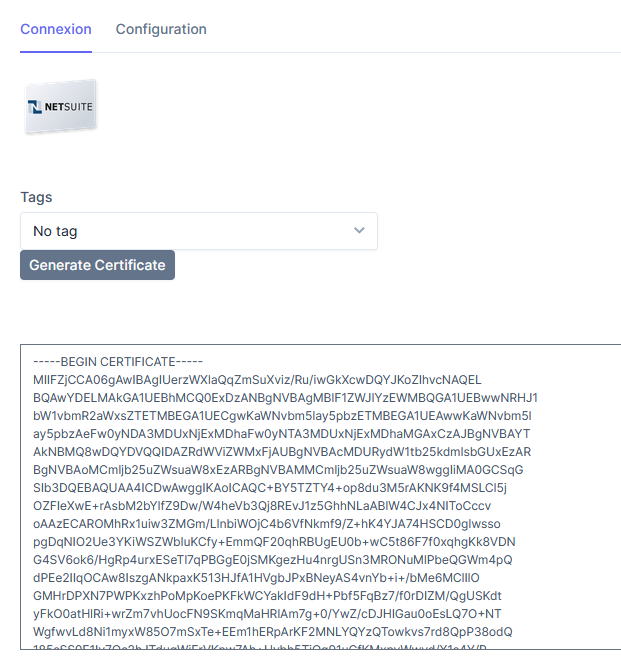
Generate an RSA Key
- In your SYNC account, generate an RSA certificate and copy the public key.
- Create a
.pemfile with the copied public key.
Upload Public Key to NetSuite
- Navigate to Setup > Integration > Manage Authentication.
- Go to OAuth 2.0 Client Credentials (M2M) Setup > New.
- Configure the following:
- Entity: Select a user with
Log in using OAuth 2.0 Access Tokenspermission. - Role: Select a role with
Log in using OAuth 2.0 Access Tokenspermission. - Application: Select your integration (e.g., iconnek).
- Entity: Select a user with
- Select the public key as the Certificate.
- Save and copy the Certificate ID.